
Dashboard Overview
You can access the user management dashboard by navigating to the “Tenants and Users” page in the left sidebar of Nile Console and then selecting the “Users” tab. Since the number of users is typically large, the dashboard has a search bar to help you find the users you need.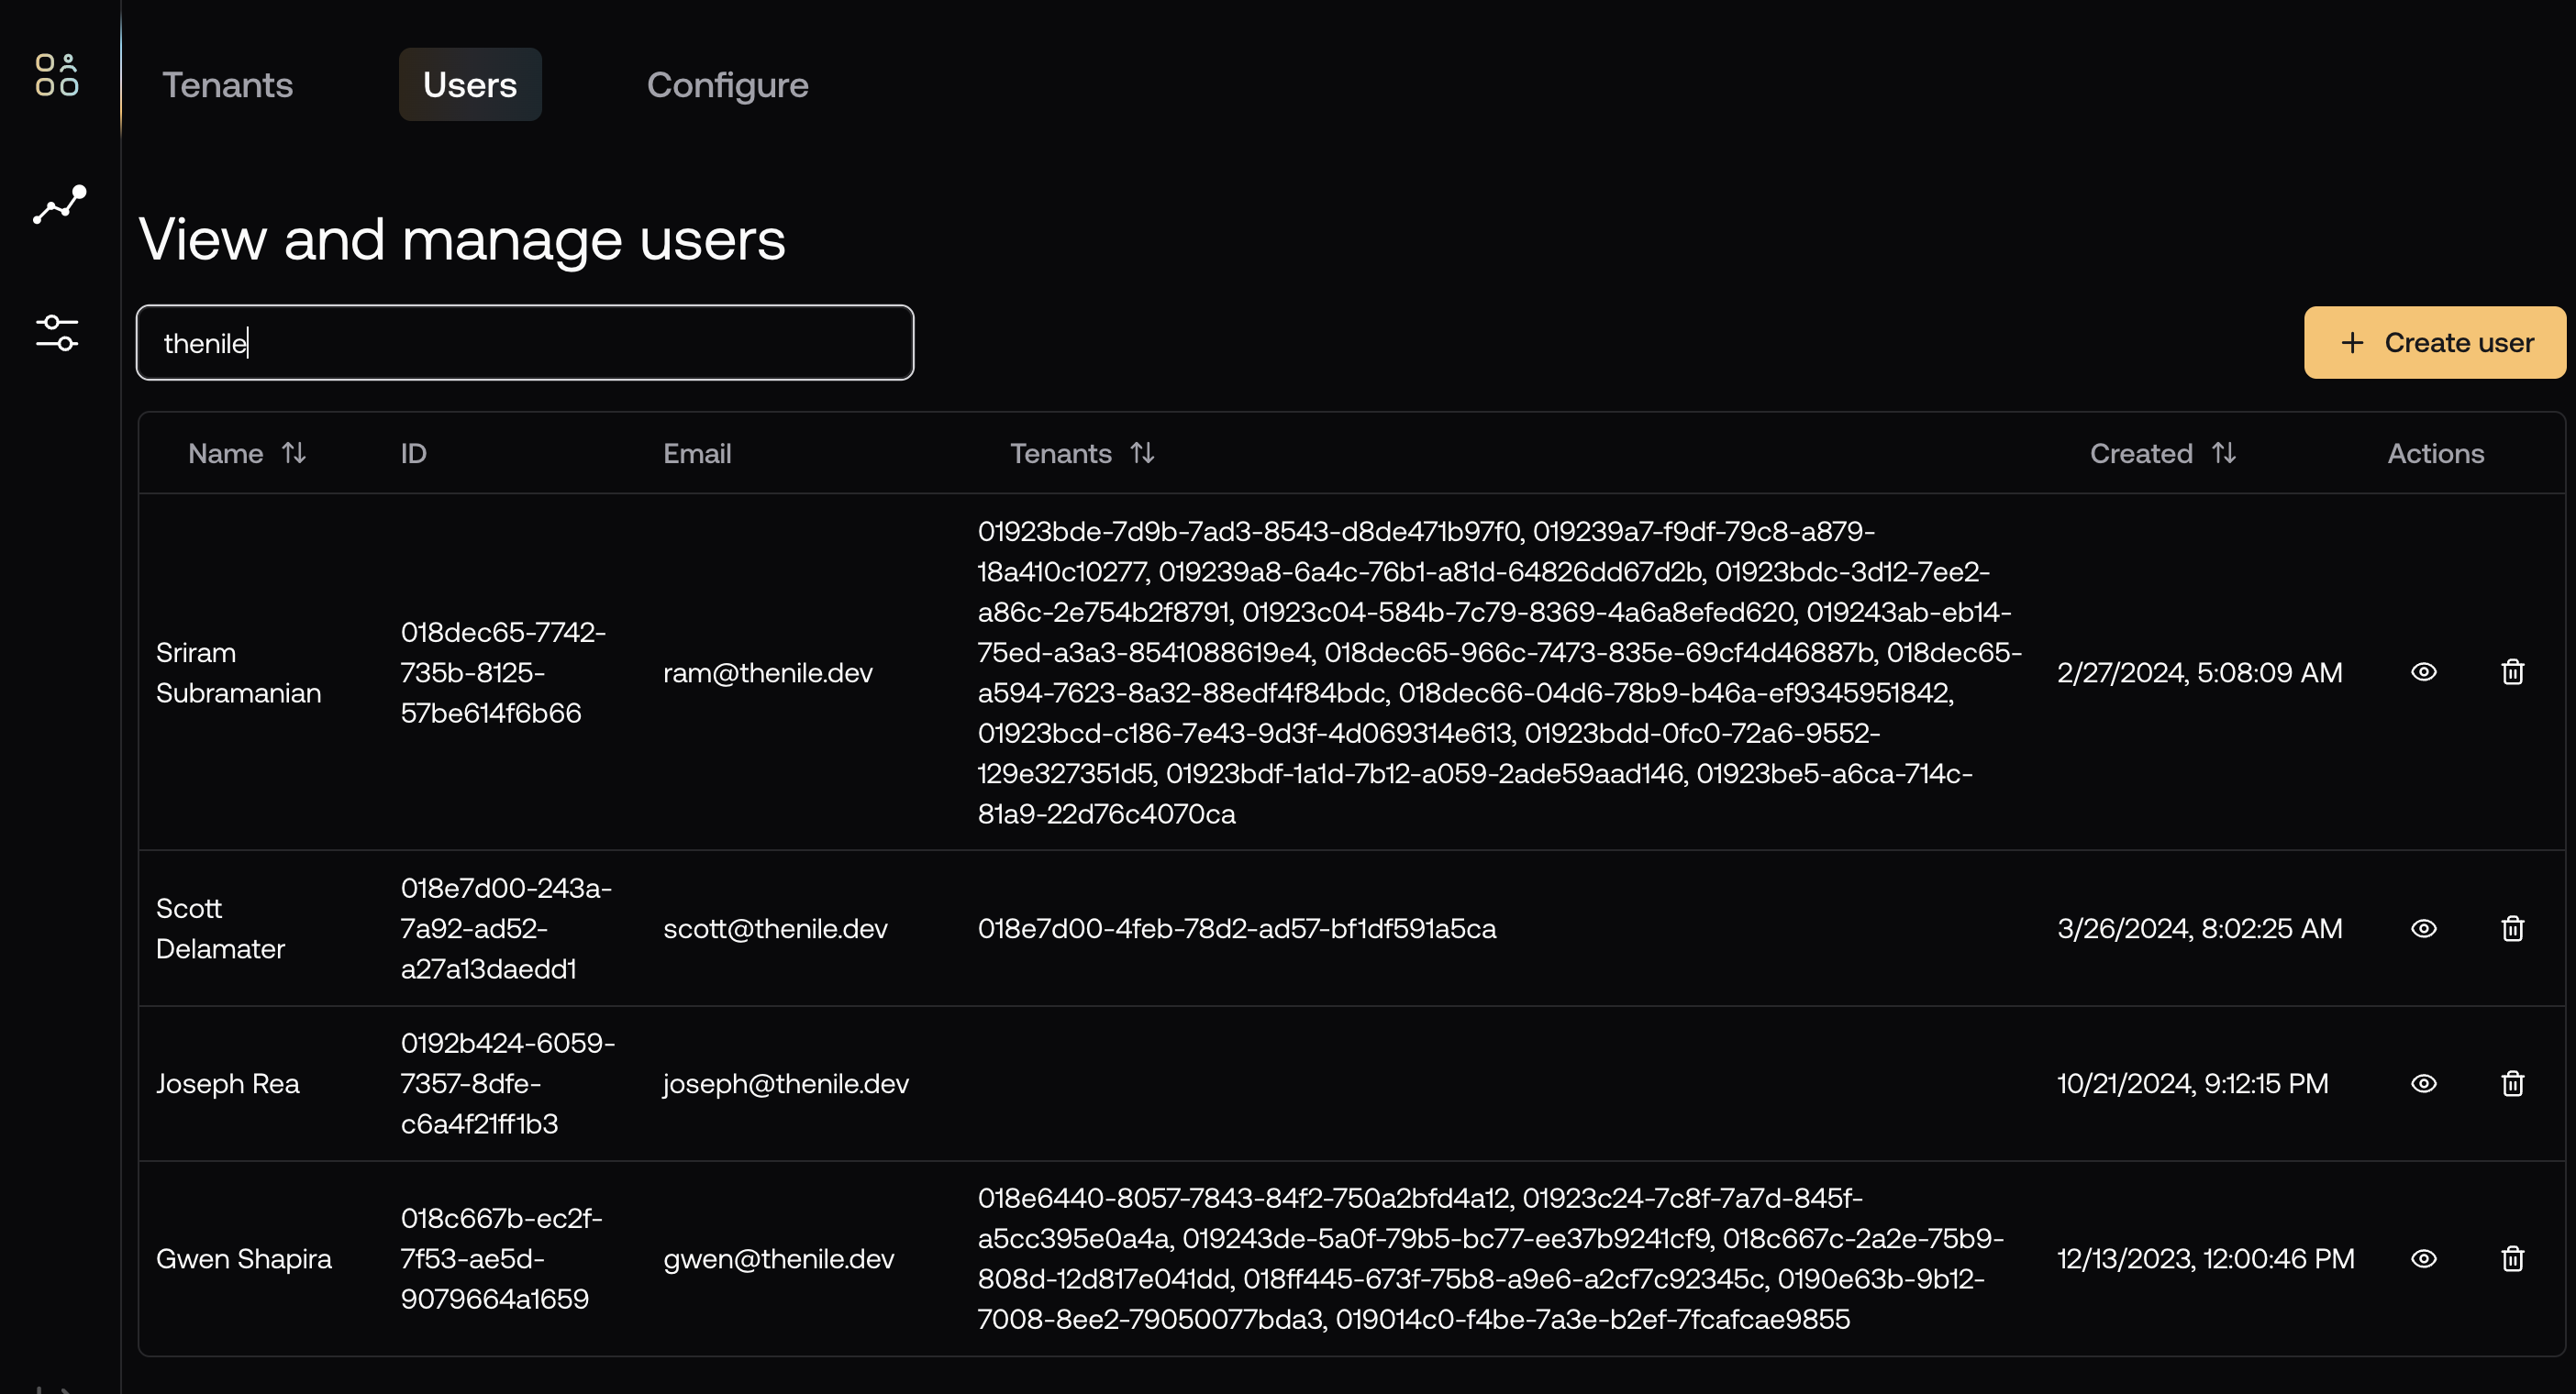
User Details View
You can click on a user to view their details: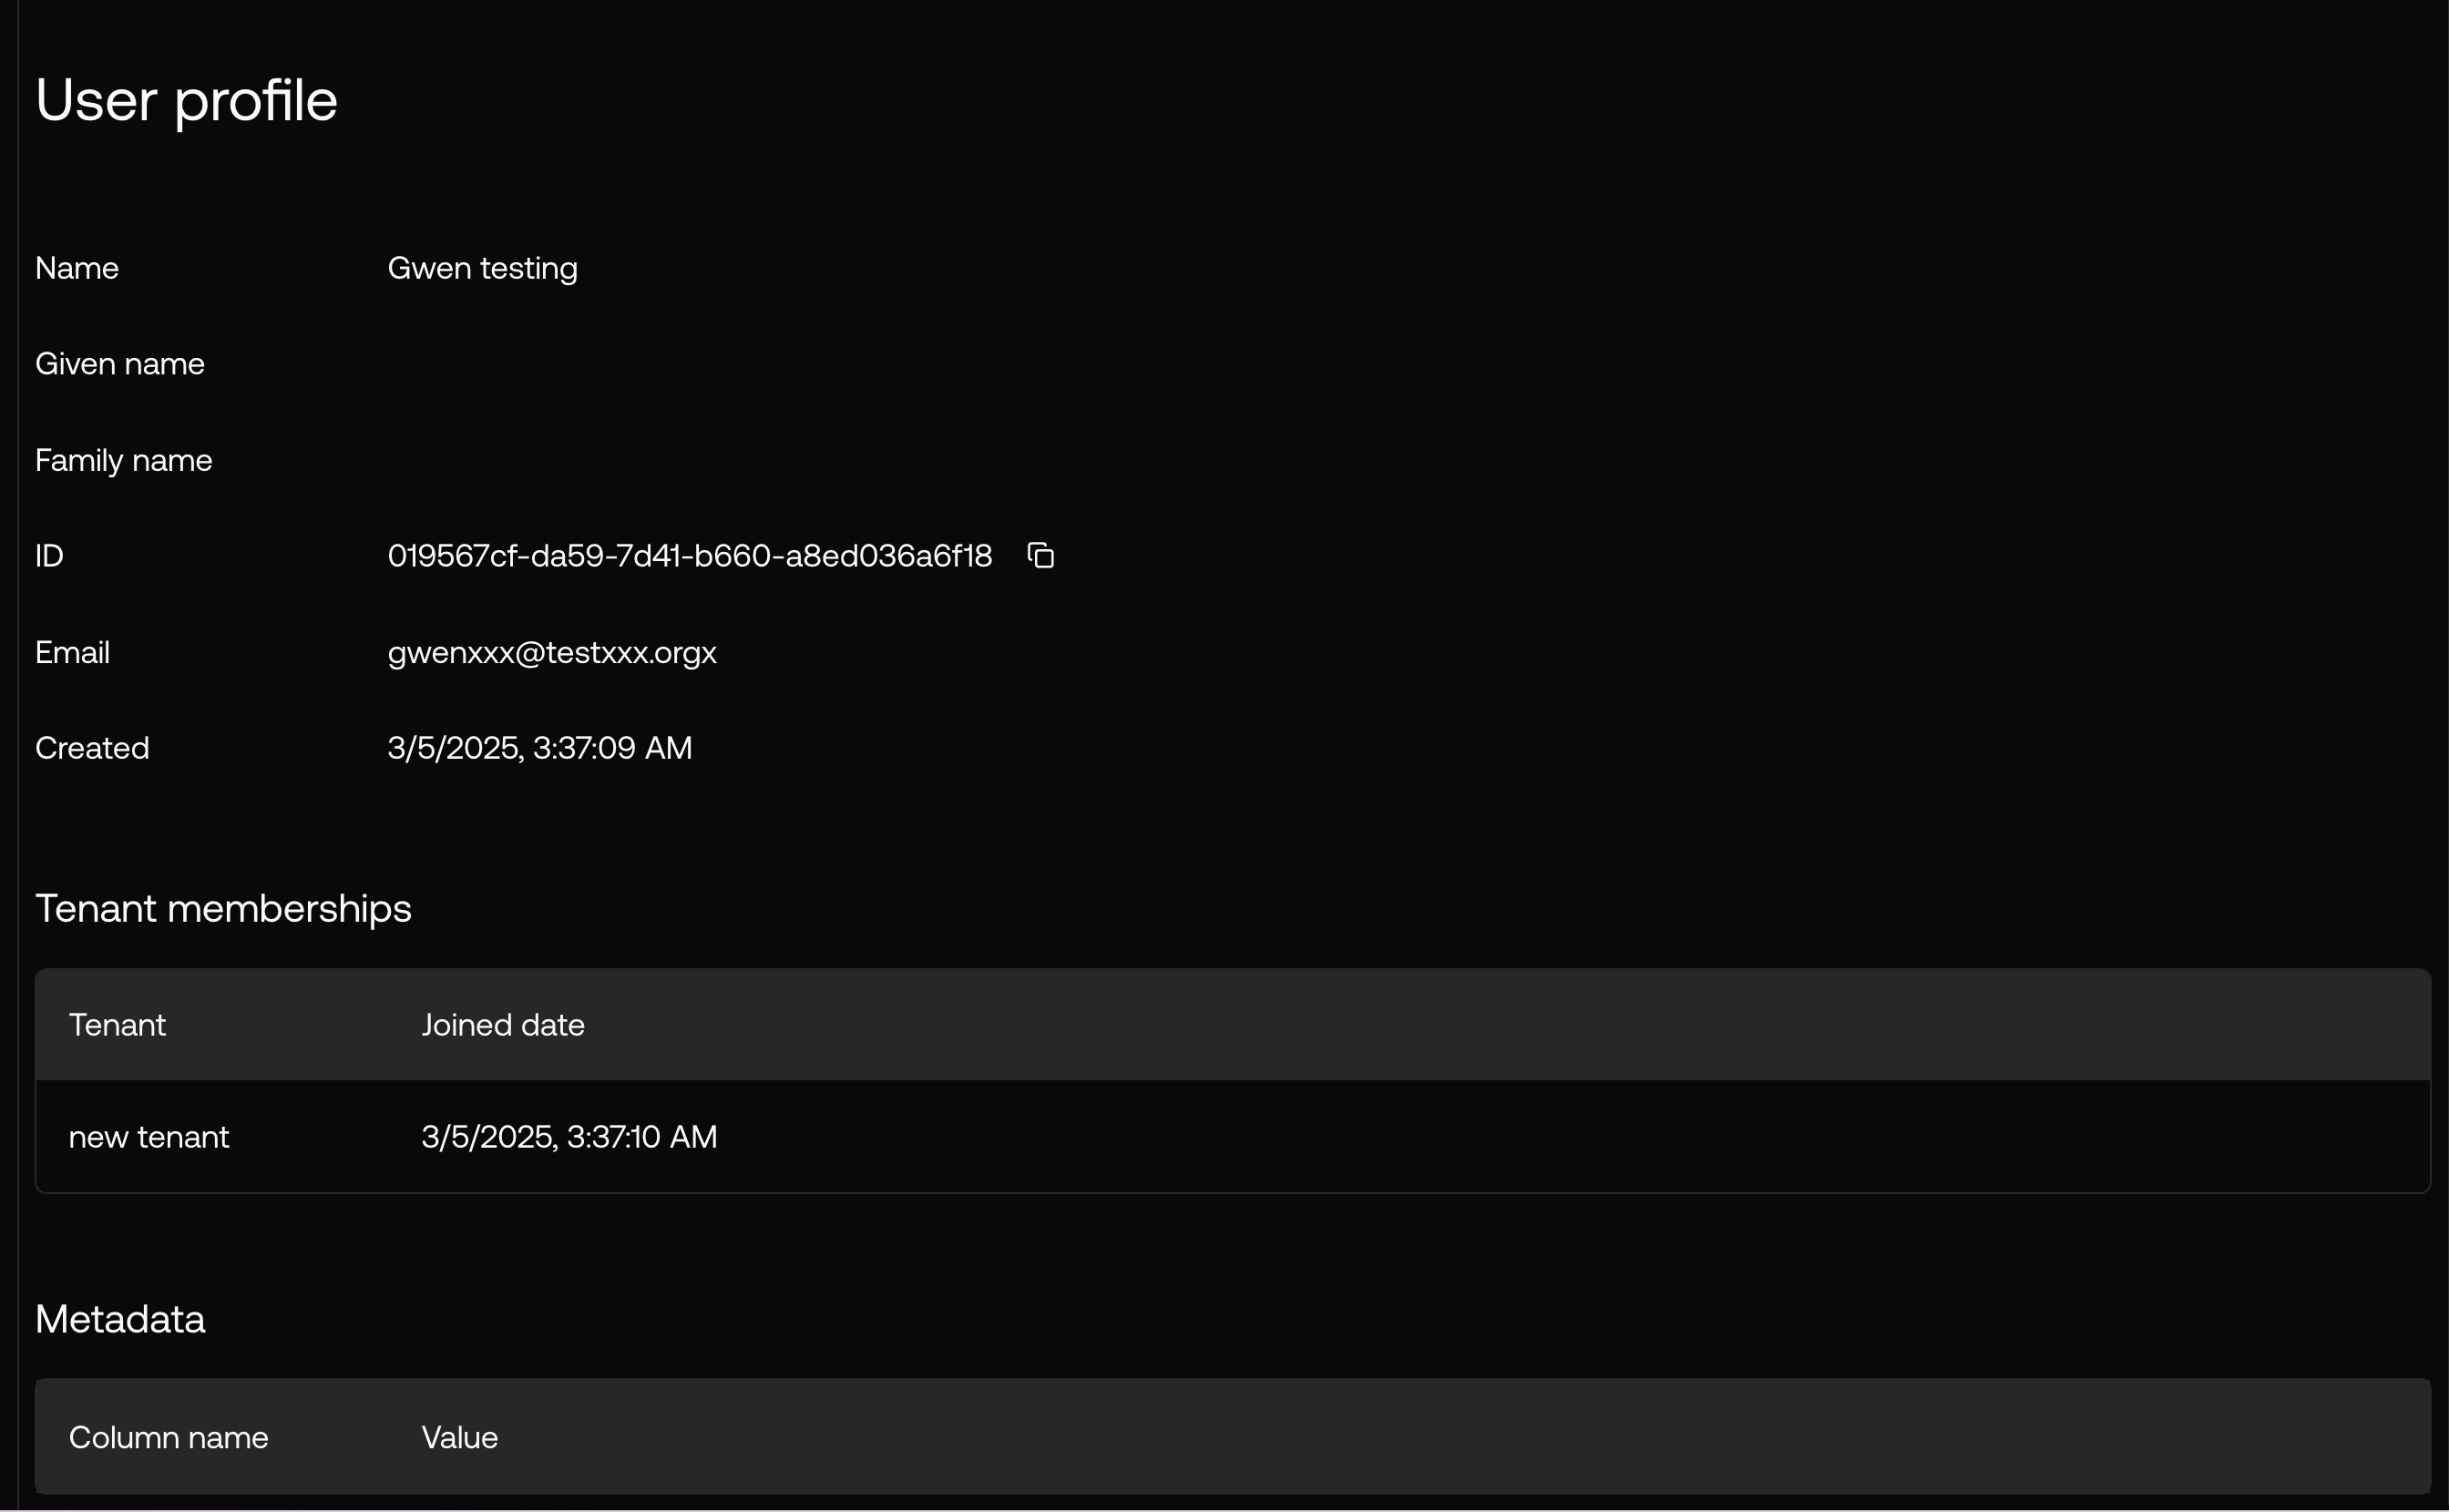
User Management
Creating Users
You can create a user by clicking on the “Create User” button in the top right corner of the dashboard. Filling in the required fields and clicking on the “Create” button will create a new user.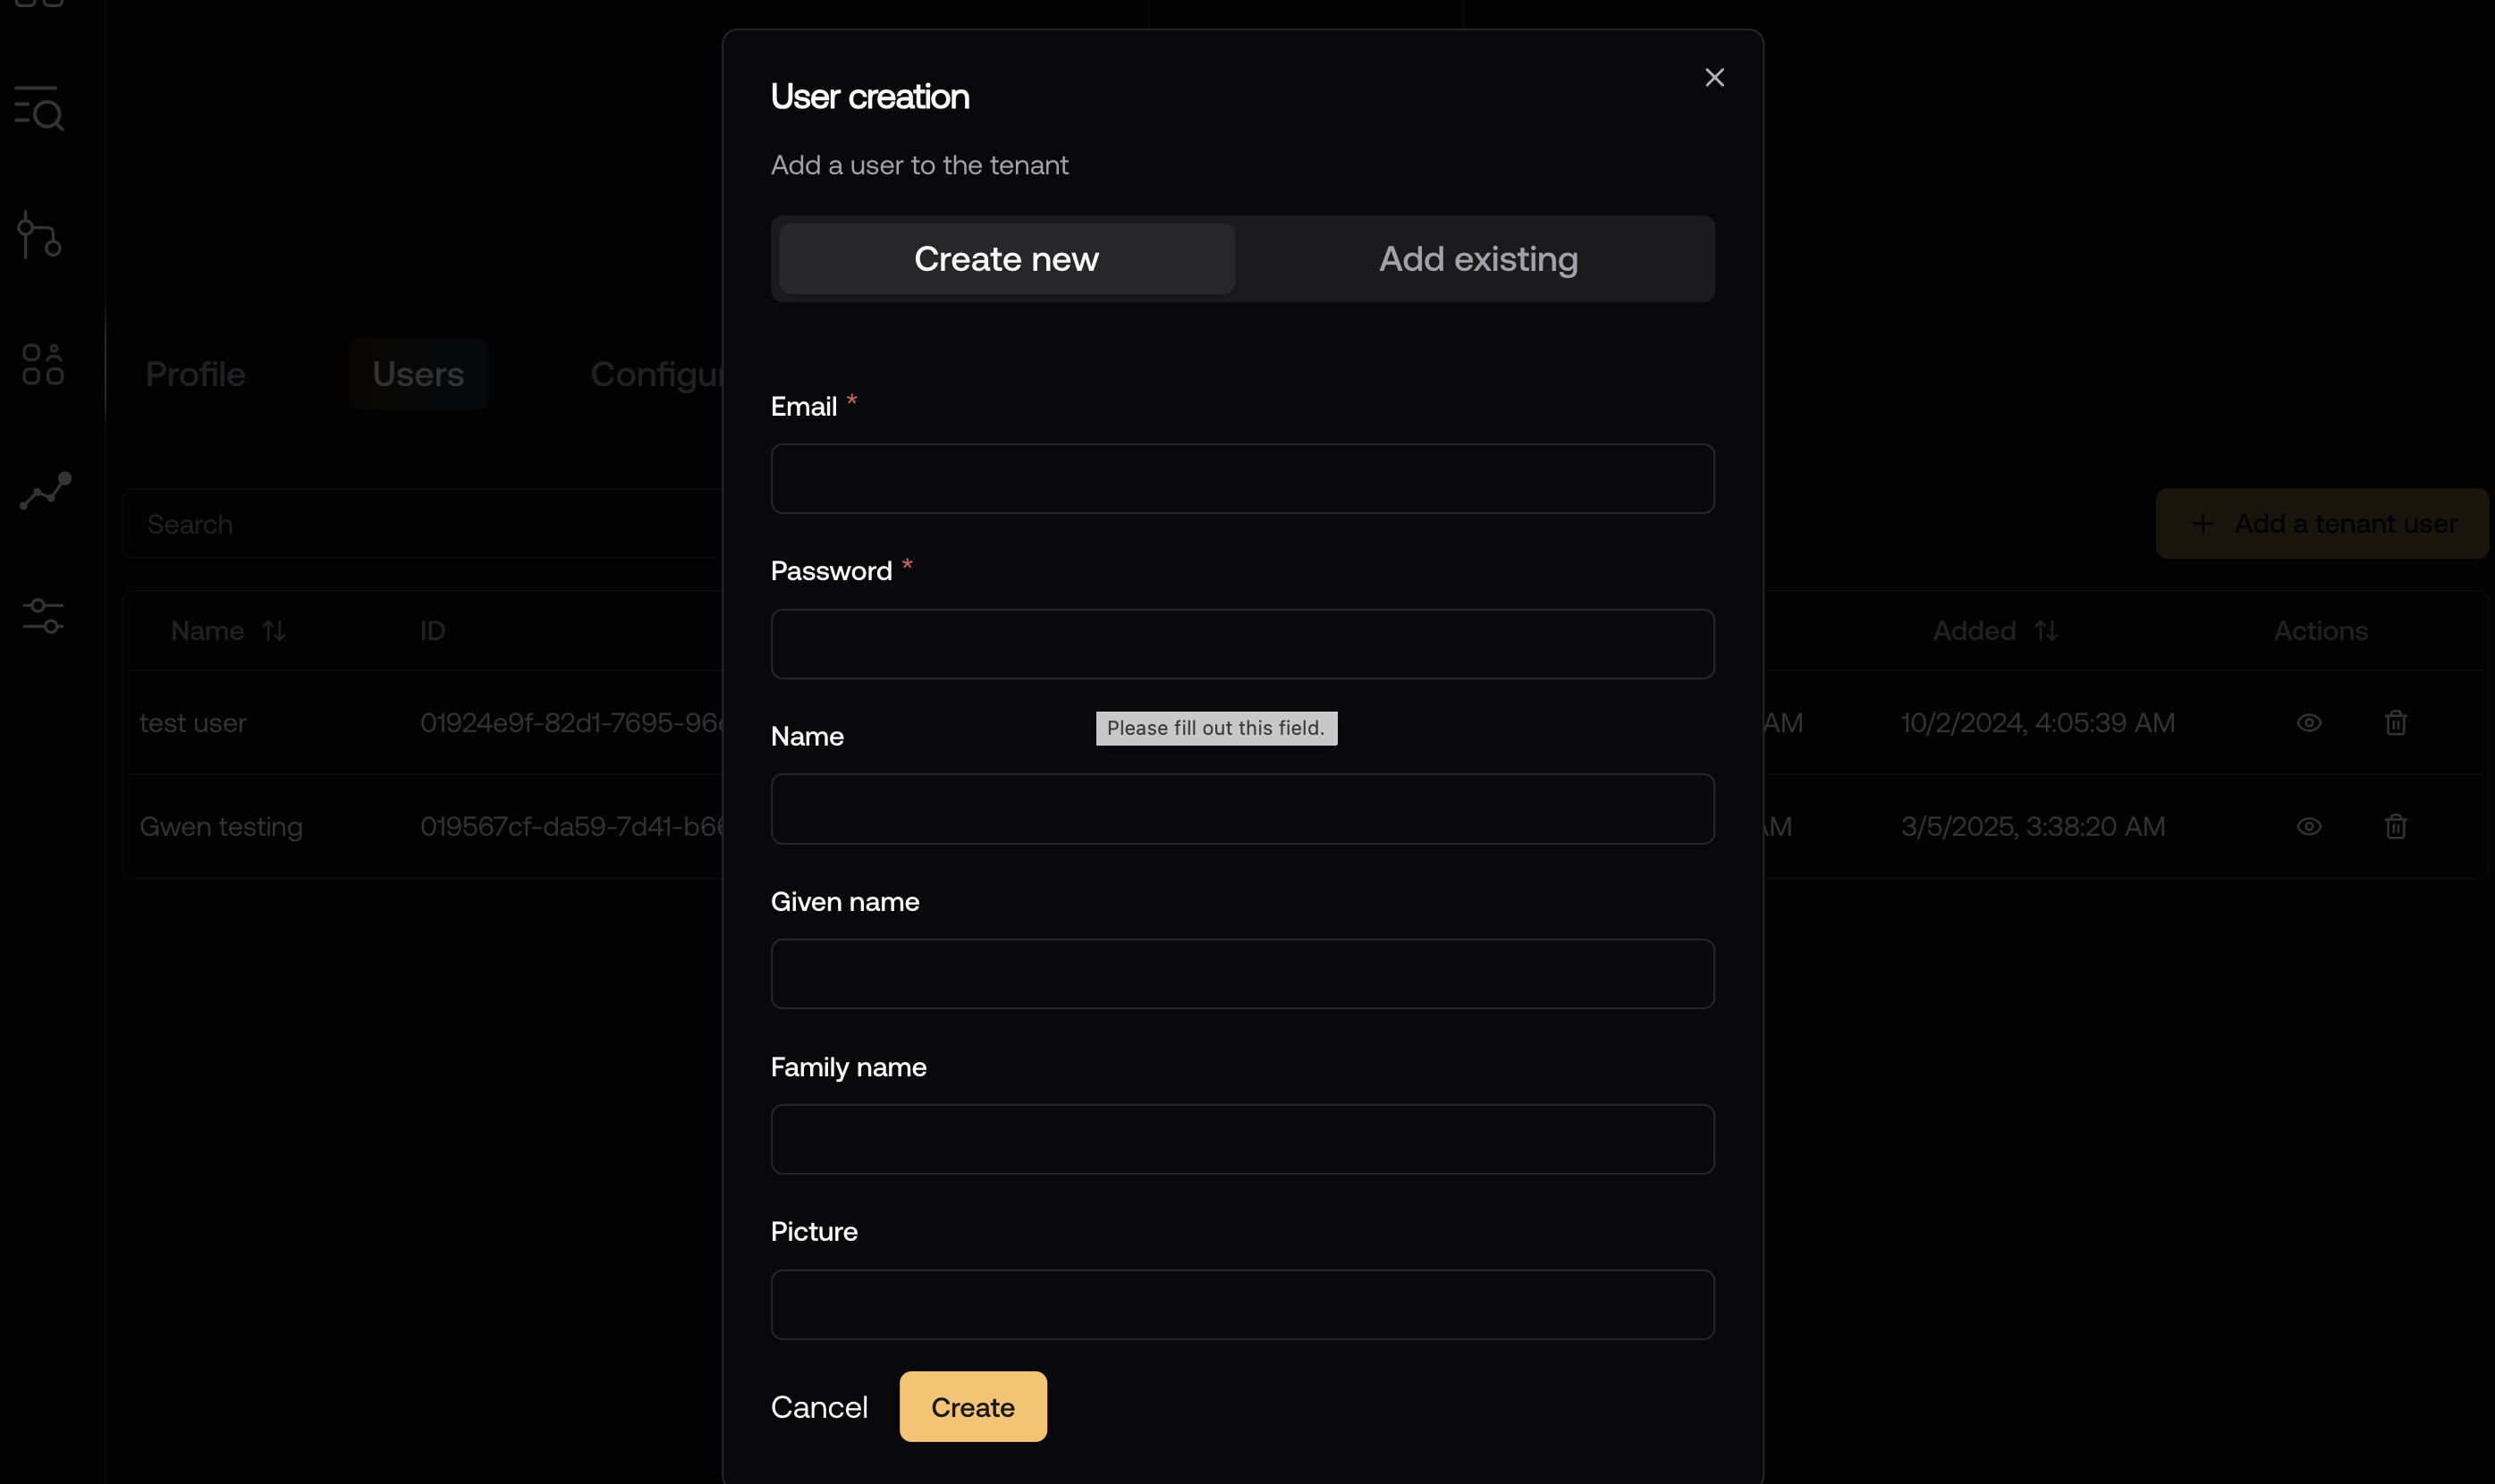
Editing Users
You can edit a user by clicking on the field you want to change and starting to type. This works both in the top level list view and in the user details view.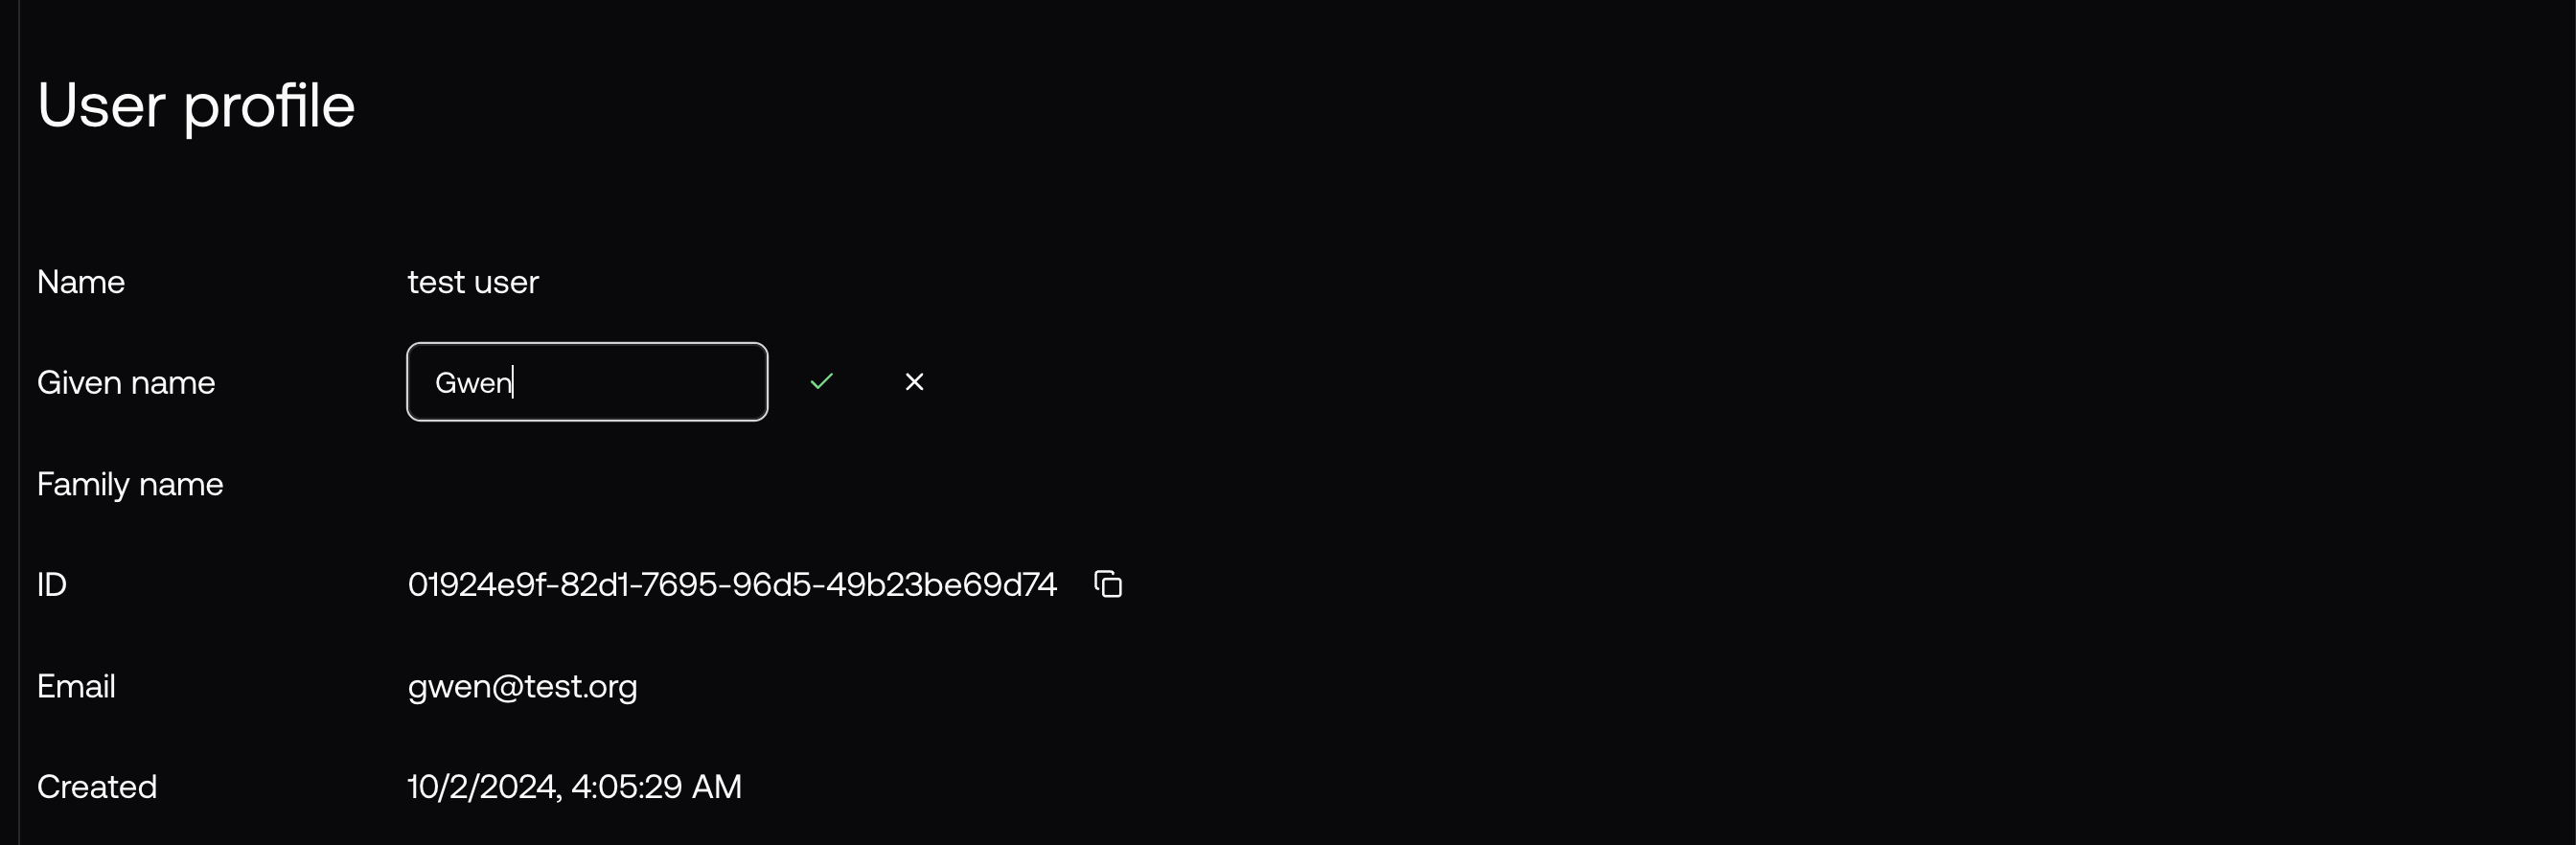
Deleting Users
You can delete a user by clicking on the “Delete” button in the user list view.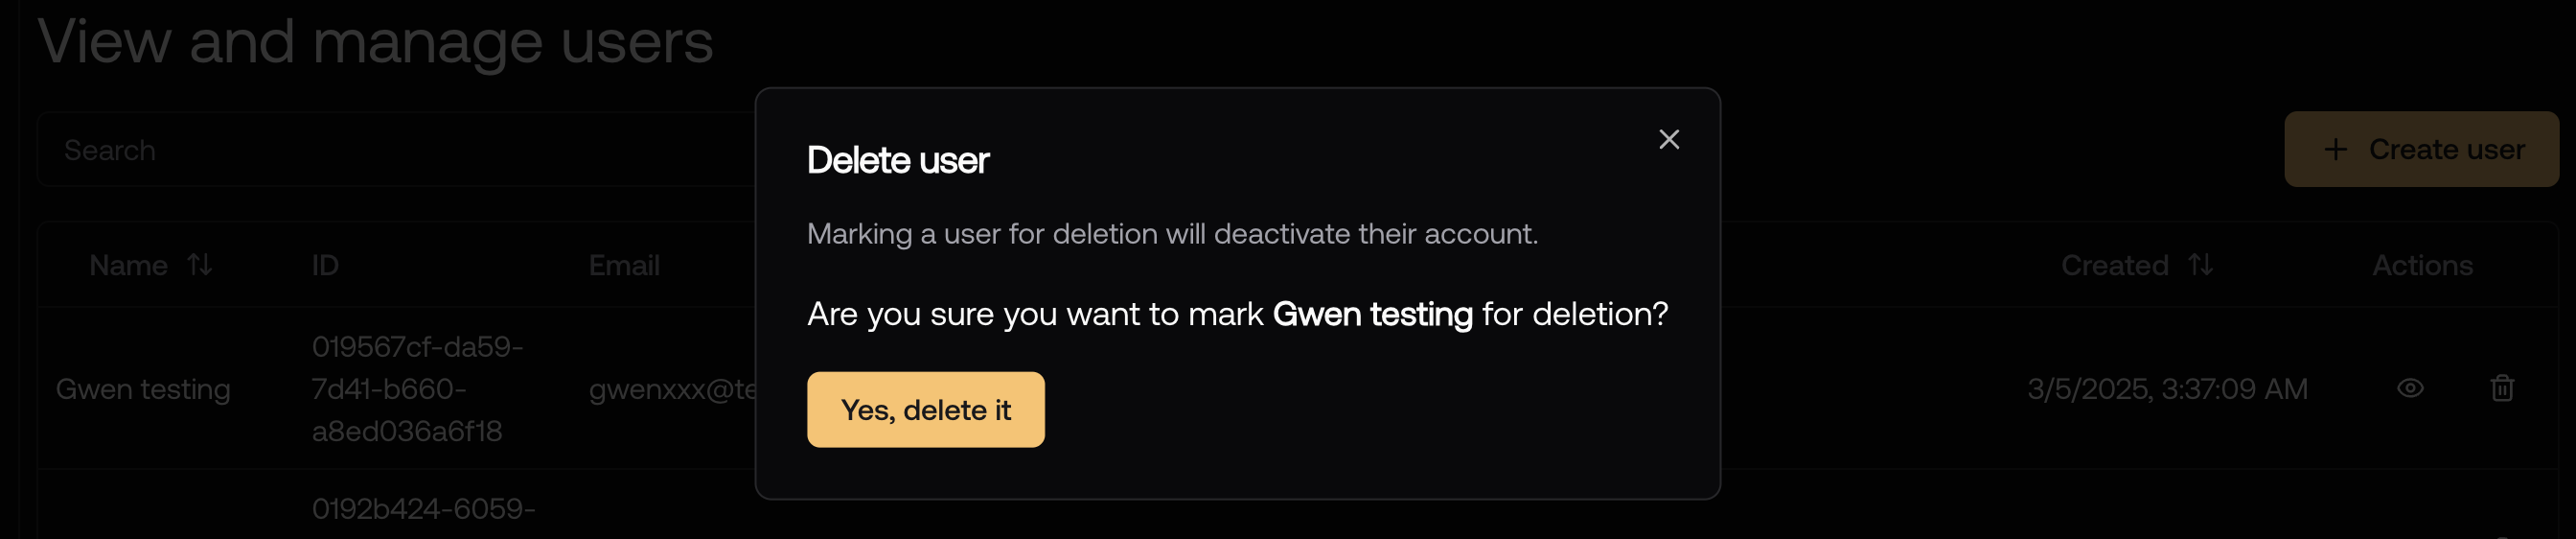
User Properties
All user properties are stored in theusers.users table. The dashboard, APIs
and SDK all use this table and therefore have access to the same properties.
User Account Verification
It is common to want to verify a user’s email address before allowing them to access your application. This is especially important for email/password users since there is no other way to know if the email address is valid. Nile Auth APIs and SDK support email verification with the<EmailSignInButton /> component.
You can learn how to use it in the Email Verification guide.
In addition, you may want to verify (or unverify) a user’s email address manually.
You can do this by updating the emailVerified property in the users.users table.
This will mark the user as verified starting from the current time.
emailVerified property to NULL.
Best Practices
- Always use meaningful names when creating users to make them easily identifiable in the dashboard
- Don’t modify existing user properties without approval from the user or an administrator for their tenant.
- Regularly review user accounts and remove inactive or invalid ones to maintain security. Nile’s users dashboard has a helpful “Last Login” column that can help you identify inactive users.
- Verify email addresses to ensure that they are valid and to prevent spam.
- Use the search functionality to quickly find users instead of scrolling through the list.
- Document any manual changes made to user accounts for audit purposes