
nile auth commands help you set up and manage authentication in your applications. These commands streamline the process of adding multi-tenant authentication to your projects and managing authentication-related configurations.
Overview
Quick Start Guide
The quickstart command helps you create a new application with Nile authentication pre-configured. Currently supports Next.js applications.Creating a Next.js Application with Authentication
- Create a new Next.js application
- Set up database credentials
- Install required Nile packages
- Configure API routes
- Add authentication components
- Start the development server
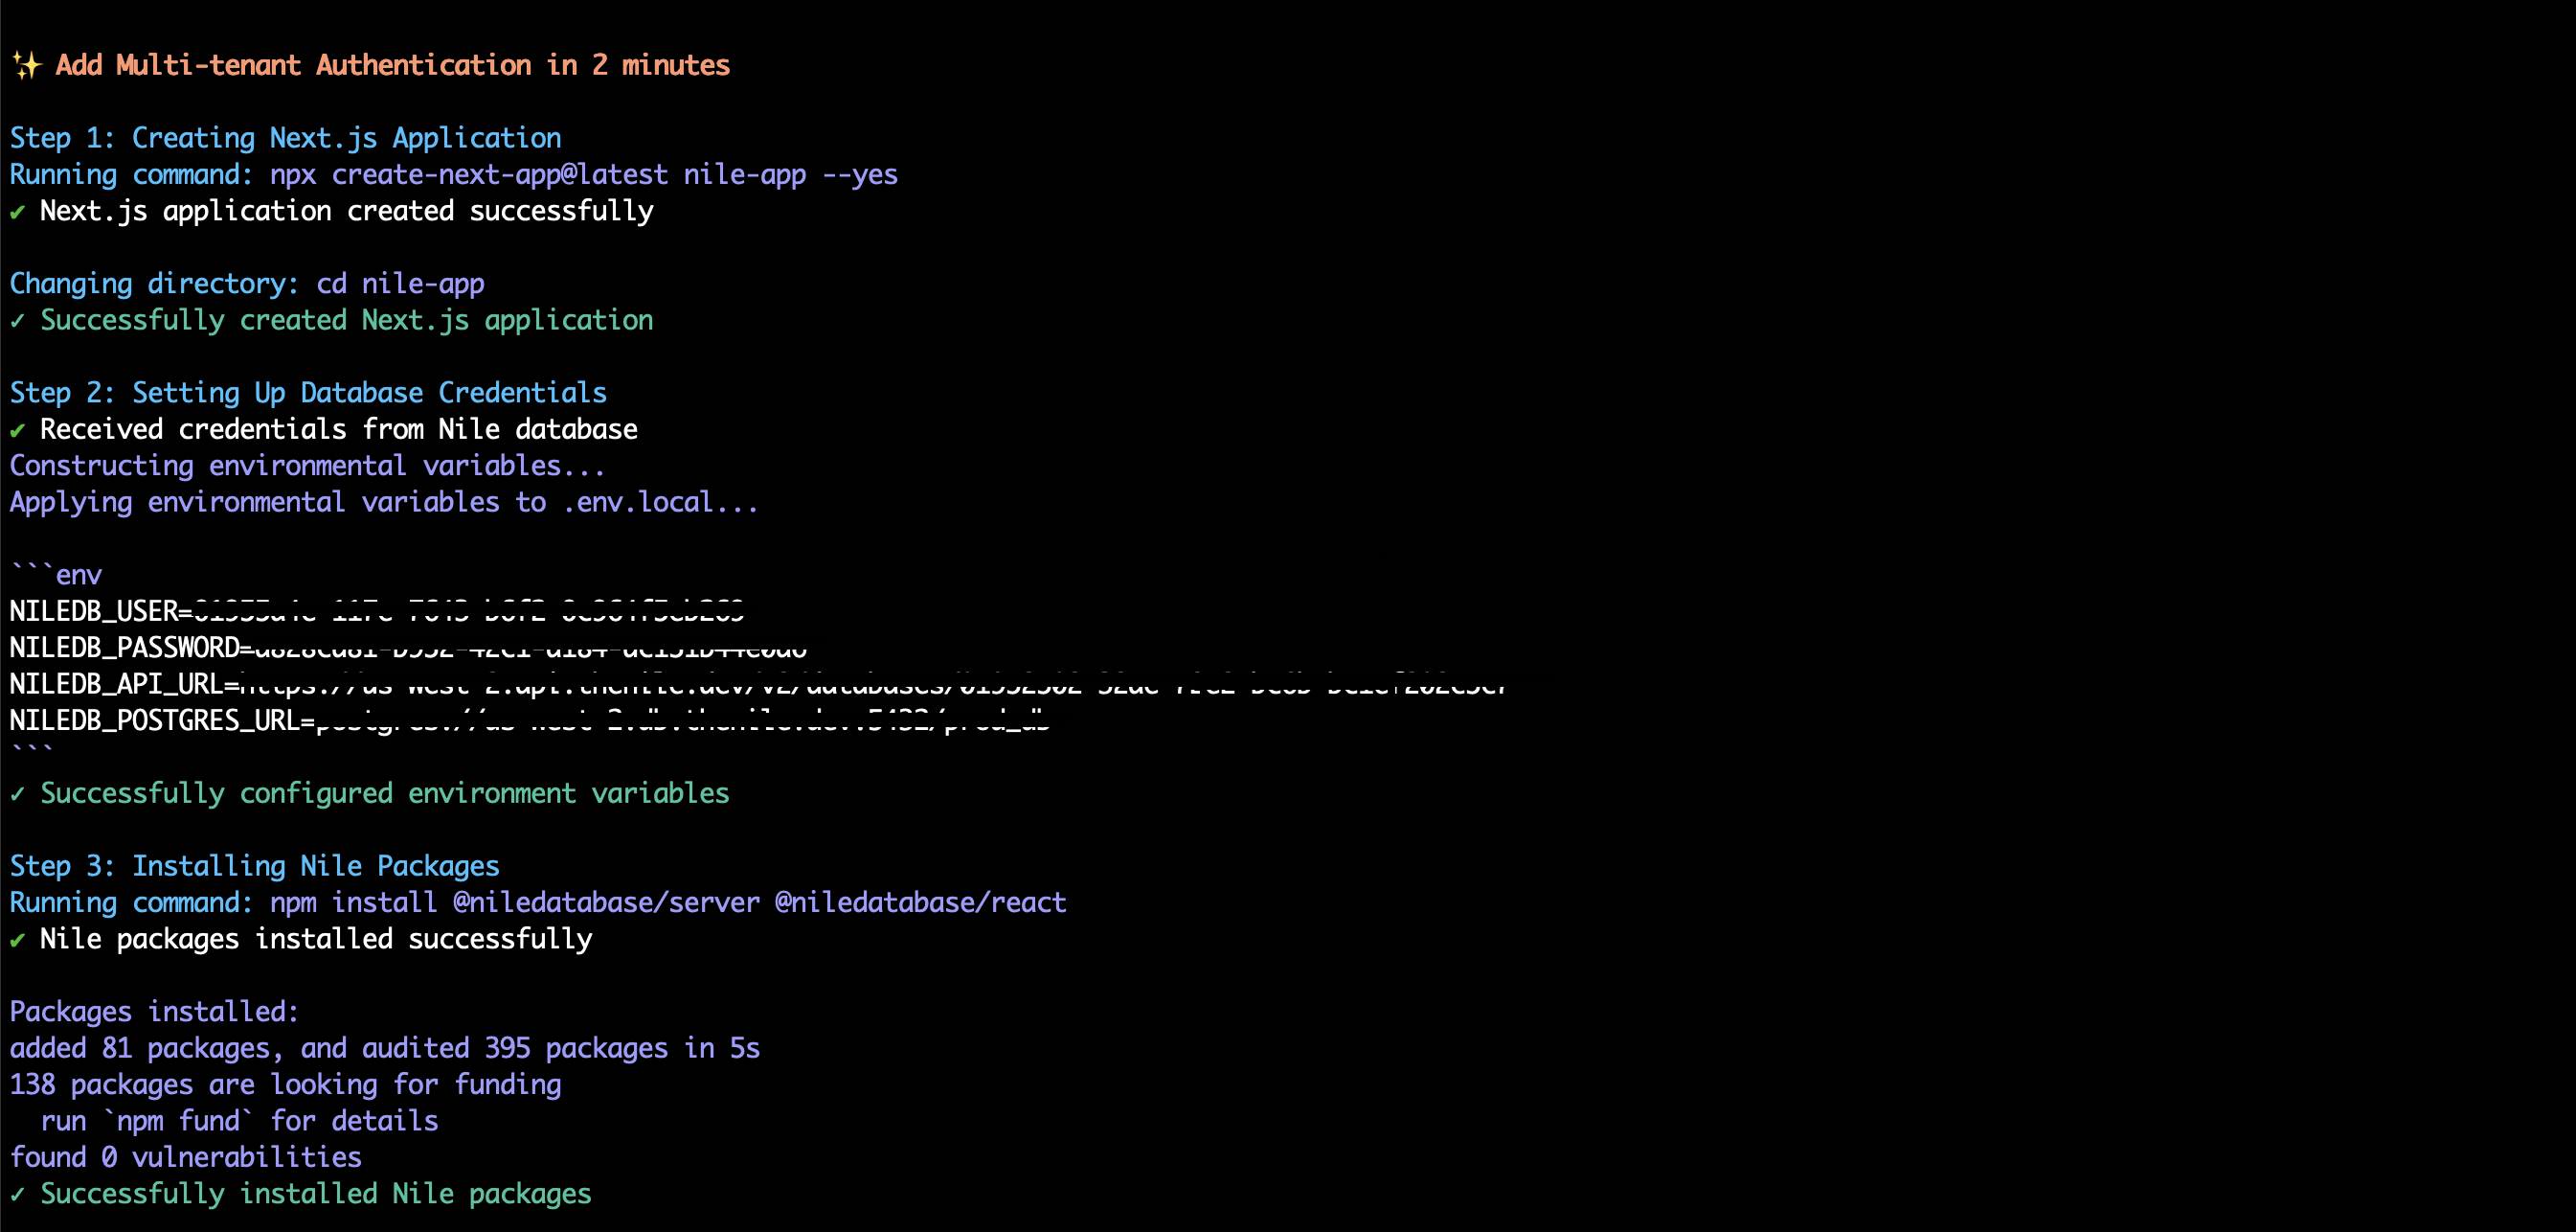
What Gets Created
The quickstart command sets up the following structure:Authentication Components
The command sets up a basic authentication page with: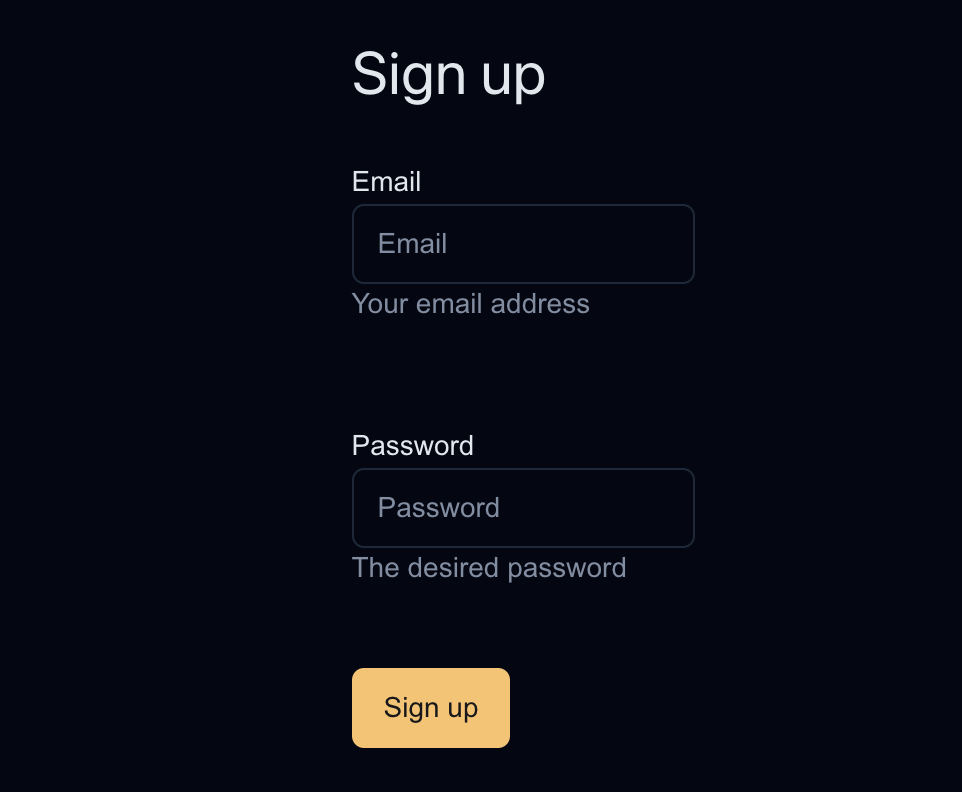
Environment Variables
Theenv command helps you generate and manage authentication-related environment variables.
Generating Environment Variables
Generated Variables
The command creates the following environment variables:Best Practices
-
Environment Variables
- Always use
--outputflag to save variables to.env.local - Add
.env.localto your.gitignore - Never commit sensitive credentials to version control
- Always use
-
Authentication Components
- Customize the authentication UI to match your application’s design
- Add additional fields to the sign-up form as needed
- Implement proper error handling
-
Security
- Keep your database credentials secure
- Regularly rotate credentials using
nile auth env - Use environment variables for all sensitive information
Troubleshooting
Common Issues
-
Quickstart Command Fails
-
Environment Variables Not Working
-
Authentication Components Not Showing
Related Commands
nile connect login- Connect to Nile using browser-based authenticationnile local start- Start local development environmentnile config- Configure workspace and database settings
Examples
Basic Authentication Setup
Custom Authentication Flow
-
Create a new Next.js app manually
-
Install Nile packages
-
Generate environment variables
-
Set up API routes and components manually
API Reference
nile auth quickstart
Options:
--nextjs- Create a Next.js application (required)
nile auth env
Options:
--output <file>- Save variables to a file (optional)